Prep time: 20 minutes
Cook time: 25 minutes
Total time: 45 minutes
Servings: 12
Are you looking for a sweet treat that perfectly captures the essence of springtime? Look no further than lemon bars. These delightful, tangy treats are a classic dessert that can brighten up any meal or gathering. With their refreshing citrus flavor and buttery crust, lemon bars are not only delicious but also incredibly easy to prepare. Whether you are a busy parent trying to whip up a quick dessert or a beginner in the kitchen, this recipe has got you covered. In this article, you will learn not just how to make lemon bars but also some invaluable tips, variations, and answers to common questions.
What Is Spring Dessert: Lemon Bars?
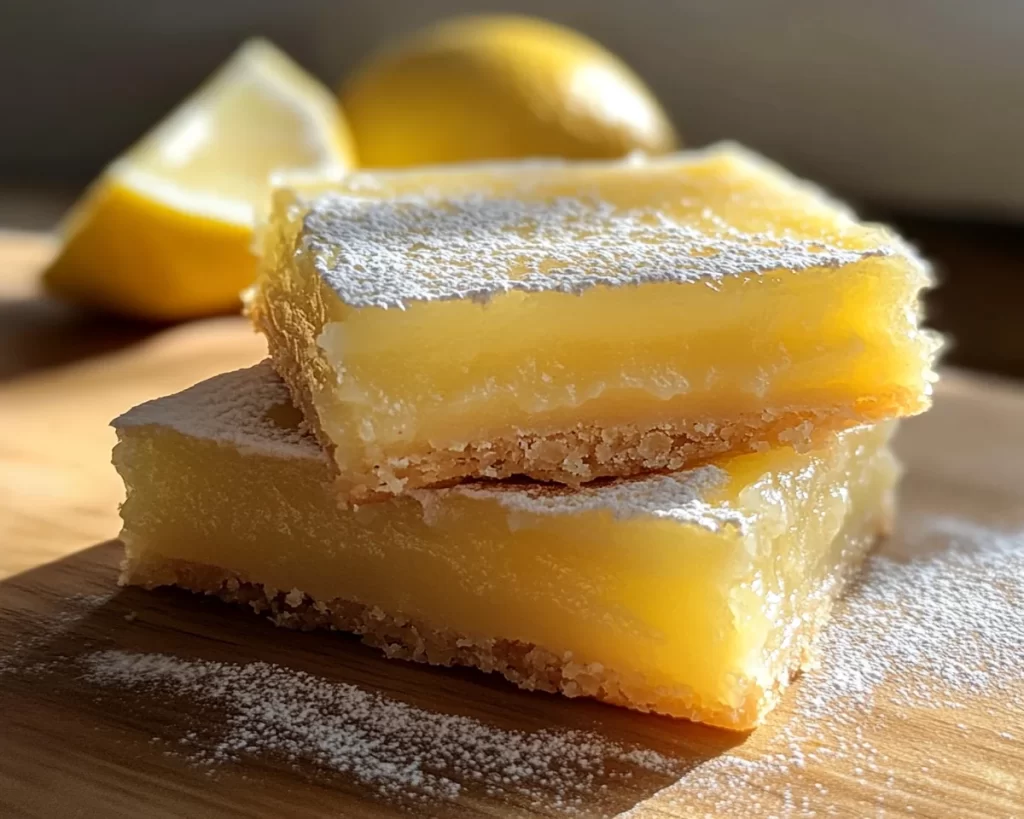
Lemon bars are a delightful dessert that consists of a shortbread crust topped with a smooth, creamy lemon filling. Originating in the United States, they were first popularized in the 1960s, quickly becoming a favorite for many. The texture is a harmonious contrast: the crust is crumbly and buttery, while the filling is velvety and tangy, providing a delightful burst of citrus in every bite. The balance between sweetness and tartness is one of the reasons lemon bars have achieved such enduring popularity.
The filling is typically made from fresh lemon juice, eggs, and sugar, which creates a bright yellow color that immediately signals freshness and flavor. A dusting of powdered sugar often completes the look, adding a touch of elegance and sweetness to the dish. Whether served at a picnic, summer gathering, or even as a light dessert after a heavy meal, lemon bars bring a sense of cheer and warmth. They evoke memories of sunshine and laughter, making them a perfect spring or summer dessert.
Why You’ll Love This
There are countless reasons to adore lemon bars. First and foremost, their flavor is simply unbeatable. The combination of fresh lemon juice and zest results in a flavor profile that is crisp yet comforting. Moreover, they are surprisingly easy to make, which is perfect for those who may not consider themselves culinary experts. With just a handful of ingredients and minimal steps, you can produce a dessert that looks and tastes like it came from a high-end bakery.
Cost is another consideration; lemon bars are generally budget-friendly. Most ingredients can be found in your pantry or local grocery store without breaking the bank. Health-wise, lemons are packed with vitamin C and other antioxidants, adding a nutritional benefit to your sweet indulgence. If you’ve been misled into believing that baking has to be both complicated and time-consuming, this recipe will change that perception entirely. You can also play with the recipe to suit various dietary needs, making it a versatile dessert that can cater to numerous audiences.
Ingredients You’ll Need
- 1 cup all-purpose flour
- 1/2 cup unsalted butter, softened
- 1/4 cup granulated sugar
- 1/4 teaspoon salt
- 2 large eggs
- 1 cup granulated sugar (for the filling)
- 2 large lemons (for juice and zest)
- 1/4 teaspoon baking powder
- 1/4 cup powdered sugar (for dusting)
Each ingredient plays a crucial role in the overall success of the dish. The flour forms the base, providing structure to the crust, while butter adds richness and flavor. Sugar in both the crust and filling acts as a sweet counterbalance to the tartness of the lemons. Eggs help set the filling, making it firm yet tender. Fresh lemons are essential; bottled juice simply does not provide the same fresh flavor. Finally, baking powder aids in stabilizing the filling, ensuring that it holds its shape after baking, and powdered sugar gives that final touch of sweetness and decoration.
How to Make
1. **Preheat your oven**: Start by preheating your oven to 350°F (175°C). A well-preheated oven ensures even baking and gives your lemon bars a beautiful, golden crust. Take this time to prepare your baking pan—either grease it lightly or line it with parchment paper for easy removal later.
2. **Make the crust**: In a mixing bowl, combine 1 cup of all-purpose flour, 1/4 cup of granulated sugar, and 1/4 teaspoon of salt. Mix these dry ingredients together until well combined. Next, add 1/2 cup of softened unsalted butter into the mixture. Using either a fork, pastry cutter, or your fingers, incorporate the butter until the mixture resembles coarse crumbs. This step is essential as it creates the crumble that will form the base of your lemon bars.
3. **Bake the crust**: Once your mixture is ready, press it firmly into the bottom of your prepared baking pan to create an even layer. Bake this crust in your preheated oven for about 20 minutes, or until it becomes slightly golden. Keep an eye on it—burnt edges can ruin the taste and texture. While the crust is baking, you can prepare the lemon filling.
4. **Prepare the filling**: In a separate bowl, whisk together 2 large eggs and 1 cup of granulated sugar until the mixture is smooth and slightly frothy. The air incorporated during whisking will contribute to the texture of your filling. Next, juice and zest 2 large lemons, and add both the juice and zest to the egg and sugar mixture. Finally, add 1/4 teaspoon of baking powder and mix well. This combination is what makes the filling bright, tangy, and incredibly delicious.
5. **Combine and bake**: Once the crust is out of the oven, pour the lemon filling over it, spreading it evenly with a spatula. Return the pan to the oven and bake for an additional 20 to 25 minutes, until the filling is set and jiggles slightly in the center. You want to avoid overbaking, as a dry filling can detract from the overall experience.
6. **Cool and serve**: After baking, remove the pan from the oven and let it cool at room temperature for about 30 minutes. Then, transfer it to the refrigerator for at least 2 hours. Chilling helps the bars set properly, making them easier to cut into squares. Once cooled, dust the top with powdered sugar for a decorative touch. Use a sharp knife to cut the bars into squares or rectangles, aiming for even portions for a polished presentation.
Variations & Substitutions
Gluten-Free Lemon Bars: If you or someone you know has a gluten intolerance, you can easily adapt this recipe by using a gluten-free all-purpose flour blend instead of regular flour. Be sure to check the other ingredients to ensure they meet gluten-free standards, particularly the baking powder. The texture may be slightly different, but you’ll still achieve that delicious lemony flavor, making it a great option for gatherings.
Vegan Lemon Bars: For a plant-based version, substitute the eggs with flaxseed meal. To create a flax egg, mix 1 tablespoon of flaxseed meal with 2.5 tablespoons of water and let it sit for about 5 minutes until it thickens. You can also replace the butter with coconut oil or a vegan butter substitute. The lemon filling will still shine through, and everyone will enjoy this refreshing dessert, regardless of their dietary choices.
Herbal Infused Lemon Bars: Adding fresh herbs can elevate your lemon bars to gourmet status. For example, infuse the butter with fresh mint or basil before mixing it into the crust for an unexpected twist. You can also add minced fresh herbs directly to the filling for an aromatic kick. This variation is perfect for home chefs looking to impress guests with unique flavors while still retaining the classic lemon base.
Common Mistakes to Avoid
One of the most common pitfalls when making lemon bars is overbaking the filling. If baked too long, it will turn rubbery and lose that lovely creamy texture. Always keep a close eye on the baking time, and consider using a toothpick to check for doneness. If it comes out clean but still slightly jiggles, it’s done.
Another mistake is using bottled lemon juice instead of fresh juice. The flavor from fresh lemons is essential to achieving that vibrant taste you expect from lemon bars. Bottled juice lacks the same brightness and may even be overly sweet. Additionally, make sure you zest the lemons carefully; you want only the yellow part of the peel, as the bitter white pith can spoil the flavor.
Finally, cutting the lemon bars too soon can lead to messy squares. It’s vital to allow them to cool completely and chill in the refrigerator for at least 2 hours to set properly. This cooling time not only improves the texture but also enhances the cutting process, yielding beautiful slices just begging to be enjoyed.
Storage, Freezing & Reheating Tips
Proper storage is vital for maintaining the freshness of your lemon bars. Once they have cooled completely, cut them into squares and transfer them to an airtight container. They can be kept in the refrigerator for up to a week, making them a fantastic make-ahead treat for events or gatherings.
If you wish to freeze lemon bars for longer storage, ensure they are well-wrapped to prevent freezer burn. You can place the squares in a single layer in a freezer-safe container or wrap them individually in plastic wrap before placing them in a zip-top bag. They will keep well in the freezer for up to 3 months. When you’re ready to enjoy them, simply transfer them to the refrigerator to thaw overnight before serving.
Remember, freezing may slightly alter the texture, so they are best enjoyed fresh. However, the citrusy flavor will remain intact, ensuring your lemon bars are an enjoyable treat any time of the year.
Frequently Asked Questions
Can I use bottled lemon juice instead of fresh lemon juice?
While it’s possible to use bottled lemon juice, the flavor of fresh lemon juice is unbeatable. Fresh lemons provide brightness and acidity that bottled juice cannot replicate. If you want your lemon bars to truly shine, always opt for fresh juice.
How do I know when the bars are done baking?
The filling should be set but still slightly jiggly in the center. A toothpick inserted into the filling should come out clean or with a few moist crumbs attached. If the toothpick comes out with wet batter, it needs more time. Keep a close eye on the baking process to avoid overcooking.
Can I make these bars ahead of time? How long do they last?
Absolutely! Lemon bars can be made a day ahead of time, which allows the flavors to mingle and improves their taste. They can be stored in the refrigerator for up to a week in an airtight container.
What should I do if my filling is too runny?
If your filling doesn’t set during baking, it may need more time in the oven. Every oven is different, so consider extending the baking period by a few minutes. In some cases, if you’ve added too much juice or not enough eggs, you could consider using less juice next time for a firmer texture.
Can I add other flavors to the lemon bars?
Definitely! You can incorporate various flavors to complement the lemon, such as herbs, vanilla, or even different citrus fruits like lime or orange. Feel free to experiment to find your perfect flavor combination.
Conclusion:
Making lemon bars is a rewarding experience that offers a burst of flavor and a satisfying texture perfect for any occasion. This recipe stands out due to its simplicity, deliciousness, and versatility, making it a must-try. Experiment with variations, impress your friends and family, or simply treat yourself—whatever you choose, lemon bars are sure to please. Don’t hesitate to share your creations and unique twists! Happy baking!