Prep time: 15 minutes
Cook time: 30 minutes
Total time: 45 minutes
Servings: 12
Finding the perfect dessert that balances sweetness with a hint of tanginess can be a delightful yet challenging task. Enter the world of **Lemon Bars**: a delectable treat that combines a buttery crust with a bright, zesty filling. These treats evoke memories of warm spring days, picnic outings, and family gatherings, making them not just a dish but an experience. They’re the perfect sweet treat to satisfy your cravings while also appealing to your guests. Whether you’re looking to impress your family or simply want to enjoy something scrumptious yourself, this recipe covers all bases. You will learn the ins and outs of making **Lemon Bars**, including taste profiles, easy preparation methods, and variations to suit your dietary needs.
What Is Spring Dessert: Lemon Bars (Easy + Bright)?
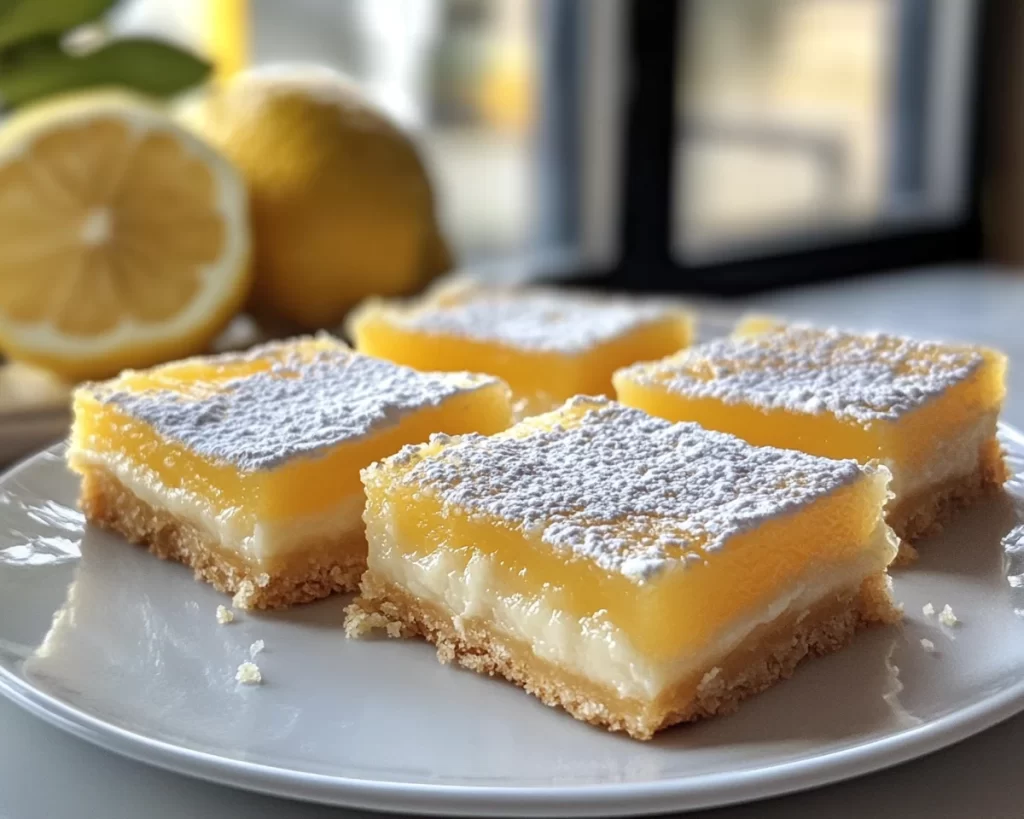
**Lemon Bars** are a classic dessert that consists of two layers: a **shortbread crust** and a luscious, tangy filling made primarily from fresh lemon juice, sugar, and eggs. Originating from the United States, these bars are a staple during spring and summer, often served at garden parties, bake sales, and special family occasions. The texture is a delightful interplay between the crumbly crust and the smooth, slightly gooey filling. Each bite bursts with citrus flavor, transporting you to a sunlit orchard filled with the scent of **fresh lemons**.
The dessert features a perfect balance of sweet and tart, making it an appealing choice for many palates. The **short crust** is buttery and crumbly, offering a satisfying texture that complements the creamy filling. As you bite into the bar, you will notice the vibrant, zesty flavor waking up your taste buds, a feature that defines its popularity. Its bright yellow hue also adds a refreshing vibe, making it visually appealing. Lemon Bars are not just about taste, but they also celebrate the essence of spring with a citrus flair that feels rejuvenating.
Why You’ll Love This
There are numerous reasons to fall in love with **Lemon Bars**. First, they are incredibly easy to make, making them perfect for both novice and experienced bakers. With just a few basic ingredients, you can whip them up relatively quickly. They are a budget-friendly option, requiring just common pantry staples like flour, sugar, butter, and eggs. Moreover, they are versatile and can be modified to cater to various dietary requirements without compromising on taste.
One common misconception about making **Lemon Bars** is that they are complicated or time-consuming. This couldn’t be further from the truth! With straightforward ingredients and a simple preparation process, you’ll find that they are quite achievable. Additionally, the **fresh lemon juice** gives them a bright flavor that can uplift any meal, making them an excellent dessert choice after a heavy dinner. They can also be served chilled or at room temperature, adding flexibility for any occasion.
Ingredients You’ll Need
- Butter (1 cup): The backbone of the shortbread crust, providing rich flavor. You can substitute with coconut oil for a dairy-free version.
- Granulated Sugar (1 ¼ cups): This sweetens both the crust and filling. For a healthier option, consider using coconut sugar.
- All-Purpose Flour (1 ¾ cups): Forms the structure for the crust. You can substitute with **gluten-free flour** if necessary.
- Eggs (4 large): Essential for the creamy filling, binding everything together. For a vegan version, use flax eggs.
- Fresh Lemon Juice (¾ cup): Provides the signature tangy flavor. Use freshly squeezed juice for the best taste.
- Lemon Zest (from 2 lemons): Intensifies the lemon flavor and adds aroma. This is a key ingredient not to skip!
- Baking Powder (½ teaspoon): Adds a slight rise to the filling, making it light. Ensure it’s fresh for the best results.
- Powdered Sugar (for dusting): Optional, but adds a beautiful presentation touch once the bars chilling time is completed.
Each of these ingredients plays a crucial role in the final product, contributing to the satisfying texture and delightful taste. Ensure you have fresh lemons since their flavor really defines the dessert. Substitutions can make this recipe inclusive for various dietary needs as well.
How to Make
1. **Preheat Your Oven**: Begin by preheating your oven to 350°F (175°C). This step is crucial as it ensures an even baking environment for your lemon bars.
2. **Prepare the Baking Dish**: Grease a 9×13 inch baking pan with butter or line it with parchment paper for easy removal later. This step helps in getting that perfect cut when the bars cool.
3. **Make the Crust**: In a mixing bowl, combine 1 cup of softened butter with ½ cup of granulated sugar and 1 ¾ cups of all-purpose flour. Mix until well combined and crumbly, as you want a crumbly texture akin to wet sand.
4. **Form and Bake the Crust**: Press the mixture into the bottom of your prepared baking pan, spreading it evenly. Bake for 15-20 minutes or until lightly golden. Keep an eye on this as it can cook quickly once it starts changing color.
5. **Create the Filling**: While your crust is baking, it’s time to prepare the lemon filling. In a separate bowl, whisk together 4 large eggs and 1 cup of granulated sugar until fluffy. Gradually whisk in the ¾ cup of fresh lemon juice, the zest from the lemons, and ½ teaspoon of baking powder.
6. **Combine and Pour**: Once your crust has finished baking, carefully pour the lemon filling over the hot crust. Return it to the oven and bake for an additional 20-25 minutes. The mixture should be set but still slightly wobbly in the center once done.
7. **Cool and Chill**: Remove from the oven and allow to cool in the pan at room temperature. Once cooled, refrigerate for at least two hours. Chilling enhances the flavors and makes cutting easier.
8. **Cut and Serve**: After chilling, dust the top with powdered sugar if you like, then cut into squares. Serve chilled or at room temperature for an uplifting spring dessert!
Throughout these steps, you’ll notice the delightful combination of aromas that fill your kitchen, reminding you of sunshine and warmth. Take your time to ensure each ingredient is well-incorporated, especially during the filling preparation, as this contributes to the silky texture of your **Lemon Bars**.
Variations & Substitutions
Gluten-Free Lemon Bars: If you or someone in your family is gluten-sensitive, you can easily adapt this recipe. Substitute the all-purpose flour with a gluten-free flour blend or almond flour. This variation will still yield delicious results, maintaining that signature tartness and creamy texture. Just be cautious to avoid overmixing, as gluten-free flours can behave differently.
Lemon Coconut Bars: For a tropical twist, consider adding shredded coconut to the crust and topping. This will not only enhance the flavor but also add a chewy texture that contrasts beautifully with the creamy lemon filling. Use sweetened coconut for a richer flavor and adjust the sugar accordingly.
Lavender Lemon Bars: Adding a hint of dried lavender to the lemon filling can elevate your dessert further. This sophisticated take introduces a floral note, perfect for special occasions. Just add one tablespoon of dried edible lavender to the filling mixture, but ensure you don’t overpower the lemon flavor as it can become too perfumy.
Berry-Lemon Swirls: Incorporate fruit by swirling in a layer of raspberry or blueberry puree into the lemon filling. This adds a bright color and a new depth of flavor. Make your fruit puree by simmering fresh or frozen fruit with a touch of sugar until it breaks down, then swirl it in just before pouring the filling on the crust.
Common Mistakes to Avoid
When making **Lemon Bars**, one of the most common errors is **overbaking**. This can result in a chewy texture instead of the creamy filling you desire. Keep an eye on baking times, and remember the filling will continue to firm up as it cools. Another trick is to ensure you use fresh lemon juice. Bottled lemon juice often lacks that vibrant taste and can lead to a dull flavor in your dessert. Make sure your lemons are at room temperature for easier juice extraction.
Another mistake is underestimating the importance of cooling the bars properly. You want them to chill completely in the refrigerator to achieve that firm texture that’s so satisfying. If you cut them too early, they may fall apart instead of holding their shape. Patience pays off!
Storage, Freezing & Reheating Tips
To store your **Lemon Bars**, keep them in an airtight container in the refrigerator. They can last up to one week, although they are often best enjoyed within a few days when they’re fresh. If you plan to make them in advance, **freezing** is an excellent option. Cut the bars into squares and freeze them in a single layer on a baking sheet. Once frozen, transfer them to an airtight container separated by layers of parchment paper.
To thaw, simply place them in the refrigerator for several hours or overnight. There’s no need to reheat **Lemon Bars** before serving; they can be enjoyed cold straight from the fridge, making them a convenient dessert for any occasion.
Frequently Asked Questions
Can I use bottled lemon juice instead of fresh?
While you can use bottled lemon juice, fresh juice provides far superior flavor. The authentic taste of fresh lemons enhances the overall experience of **Lemon Bars**, making them significantly more enjoyable.
Why is my filling not set? What can I do?
If your lemon filling isn’t setting, it’s likely due to insufficient baking time. Ensure you bake until you see slight browning around the edges and a set texture in the center. If it’s undercooked, return it to the oven for an additional 5-10 minutes, keeping a close eye on it.
Can I make these bars vegan?
Absolutely! You can substitute the eggs with flax eggs (1 tablespoon of flaxseed meal mixed with 2.5 tablespoons of water equals one egg) or a commercial egg replacer. Remember that the texture might slightly differ, but you can still achieve a creamy filling.
How do I know when the bars are done baking?
The bars are done when the edges are lightly browned and the filling has set with only a slight wobble in the center. They will firm up more as they cool, so it’s essential not to overbake.
Can I use other citrus fruits for the filling?
Yes! While lemons are traditional, you can experiment with other citrus like limes, oranges, or grapefruits. Each will provide a unique flavor profile, perfect for creative variations.
Conclusion:
These **Lemon Bars** are not just a dessert; they are a celebration of spring, with their vibrant color and delicious flavor. They are simple to prepare, budget-friendly, and can be customized to cater to different tastes. Whether you enjoy them warm, chilled, or with a twist of berries or coconut, they are sure to become a favorite in your household. Don’t hesitate to dive into this recipe, add your creative flair, and share it with friends and family. The joy of enjoying homemade treats is always a delightful experience, and these **Lemon Bars** will undoubtedly bring smiles to many faces!