Prep time: 30 minutes
Cook time: 0 minutes
Total time: 4 hours (including chilling time)
Servings: 12
There’s something incredibly nostalgic about desserts that truly celebrate the seasons, and the **St Patrick’s Day Mint Chocolate Icebox Cake** is one of those magical treats. As a beloved fan favorite, it’s not just any dessert; it’s a minty, chocolatey celebration that transports you straight into the spirit of St. Patrick’s Day! Imagine creamy layers of rich chocolate mingling with the refreshing taste of mint, all encased in a delightful blend of textures. This icebox cake requires minimal baking, making it perfect for anyone, including busy parents and beginners in the kitchen.
This dessert is special not only because it’s visually stunning but also because it allows you to customize layers and flavors according to your preference. You’ll learn how it comes together so effortlessly, bringing joy to your table without hours spent in the kitchen. With practical tips on preparation and variations to suit different dietary restrictions, you can craft this delicious cake and impress your family and friends alike.
What Is St Patrick’s Day Mint Chocolate Icebox Cake?
The **St Patrick’s Day Mint Chocolate Icebox Cake** is a no-bake dessert that’s perfect for celebrating the holiday while indulging in a rich chocolate experience. Originating as a means to utilize leftover ingredients (thus the name “icebox”), this cake has evolved to become a modern favorite. Its unique texture comes from layers of crispy cookies or graham crackers that soften as they absorb moisture from the creamy filling, creating a cake-like consistency.
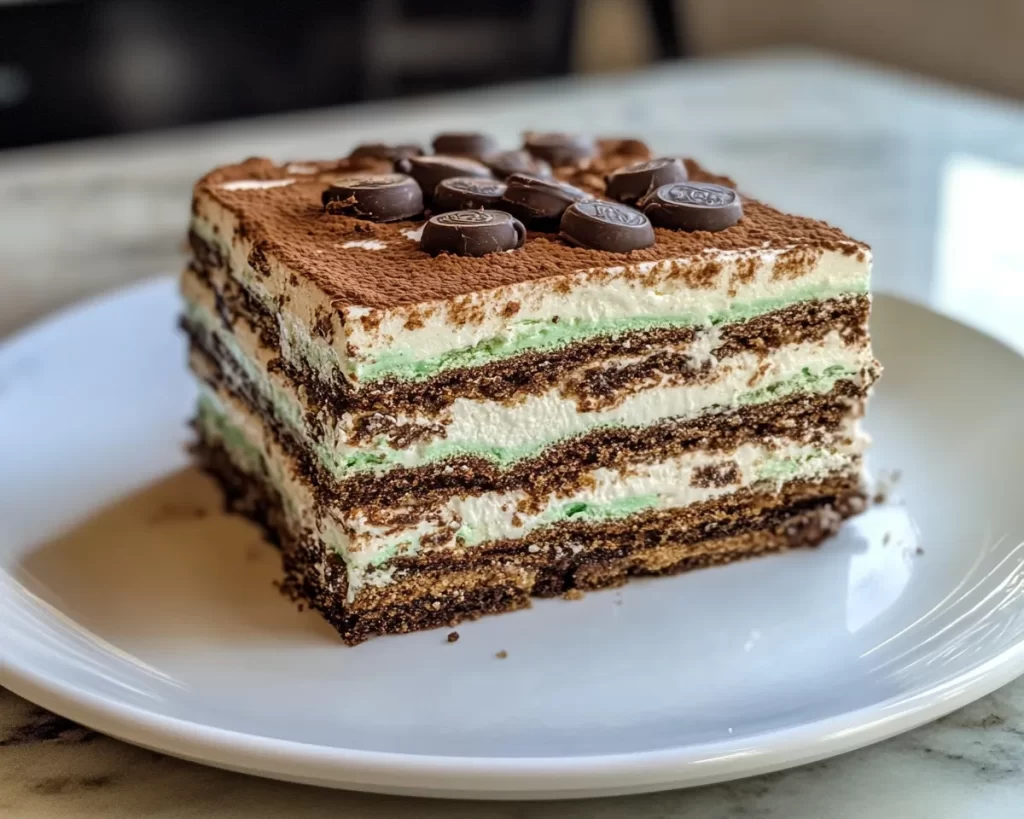
In this dessert, **mint chocolate** flavor shines through thanks to the use of **mint extract**, paired perfectly with a rich chocolate cream layer. The refreshing mint adds a wonderful brightness to the cake, while the chocolate satisfies those cravings for something sweet and rich. The combination of textures — crispy, creamy, and soft — makes every bite an intriguing experience. This cake is not only visually appealing, with its vibrant green and dark brown layers, but it also brings a festive spirit to any gathering.
Why You’ll Love This
One of the standout features of the **St Patrick’s Day Mint Chocolate Icebox Cake** is its delightful taste. The creamy, chocolatey layers paired with refreshing mint are a union that feels both indulgent and refreshing, perfect for a festive occasion. Plus, the ease of preparation means you can spend less time fussing in the kitchen and more time enjoying the company of friends and family.
Creating this dessert is cost-effective; the ingredients are simple and can often be found in your pantry or local grocery store. It’s versatile, too; whether you’re serving it at a party, as a potluck dish, or even as a delightful way to end a meal, it fits seamlessly into various occasions. Many people think icebox cakes are just a summer treat, but this mint chocolate version shows that they can be enjoyed year-round.
Furthermore, making icebox cakes can help beginners feel more comfortable in the kitchen. With straightforward assembly rather than complex cooking techniques, anyone can achieve success, making it a fantastic recipe to add to your collection.
Ingredients You’ll Need
- Chocolate wafer cookies: These serve as the base layer for your cake. If you can’t find chocolate wafers, you can substitute with graham crackers.
- Heavy whipping cream: Essential for creating a luscious, creamy filling. This is a key ingredient that adds richness; a lower-fat substitute may not yield the same results.
- Powdered sugar: This sweetens the cream and helps stabilize it, ensuring that the filling holds its shape once layered.
- Mint extract: Provides that essential minty flavor which characterizes this recipe. Be cautious with the amount as it’s potent.
- Cocoa powder: Adds depth to the chocolate flavor. Unsweetened cocoa powder works best for controlled sweetness.
- Green food coloring: Optional but adds a festive touch to your creamy layers.
- Chocolate chips: For decorating, you can use semi-sweet or dark chocolate, adding a celebratory element to your presentation.
Each ingredient plays a critical role in achieving the delightful harmony of flavors and textures that this cake offers. You can get creative with substitutions, and if you are looking to make a gluten-free version, look for gluten-free cookie options or even use crushed nuts for the base.
How to Make
- Prepare the creamy filling: In a large mixing bowl, combine the heavy whipping cream, powdered sugar, cocoa powder, and mint extract. Using a hand mixer or stand mixer, whip on medium speed until the mixture thickens and soft peaks form. This could take about 3-5 minutes. The key is to watch the consistency closely; you don’t want to over-whip and turn it into butter.
- Assemble the first layer: Take a baking dish or a springform pan and lay down the first layer of chocolate wafer cookies. If you’re using graham crackers, break them as needed to fit the bottom. Brush with a tablespoon of milk to help soften them, making them easier to bite into later.
- Add the filling: Spoon about one-third of the whipped cream mixture over the first layer of cookies. Use a spatula to gently spread it in an even layer, making sure it reaches the edges. This helps to hold the layers together as they chill.
- Repeat the process: Continue layering cookies and filling. After adding the second layer of cookies, add another third of the filling. Repeat until all ingredients are used. Your final layer should be the filling to create a beautifully smooth top.
- Chill the cake: To allow the layers to meld and the cake to set, cover the dish with plastic wrap or foil and let it chill in the refrigerator for at least 4 hours, preferably overnight. The longer it sets, the better the flavors develop, and the texture becomes more cake-like.
- Garnish and serve: Once chilled, remove the cake from the refrigerator. Use a sharp knife to cut through the layers, being careful to preserve the structure. Decorate the top with chocolate chips or shavings for a beautiful presentation, and add fresh mint leaves for a pop of color.
With each step, allow your senses to guide you — from the rich aromas of the chocolate filling to the refreshing notes of mint. Remember that inviting friends to help layer the cake can turn this into a fun group activity, especially for busy parents.
Variations & Substitutions
Variation: Mint Chocolate Chip Icebox Cake
If you’re a fan of mint chocolate chip ice cream, this is the variation for you! To create this exciting twist, fold in miniature chocolate chips into the whipped cream mixture. This gives each bite an added surprise of texture and bursts of chocolate flavor. For an even more authentic feel, you might want to use mint chocolate cookies instead of plain chocolate wafers. This adaptation makes the cake perfect for those who enjoy textural elements in their desserts while keeping the delightful minty essence.
Variation: White Chocolate Mint Icebox Cake
For a sweeter, alternative treat, consider making a **white chocolate mint** version. Replace the cocoa powder with melted white chocolate, and use a white chocolate ganache to flavor your whipped cream. This variation provides a fun contrast against the traditional mint chocolate flavor, making it suitable for those who prefer a milder taste while still enjoying the festive essence of mint.
Variation: Vegan Mint Chocolate Icebox Cake
If you’re aiming for a plant-based version, you can easily substitute key ingredients. Instead of heavy cream, use coconut cream or a store-bought vegan whipped topping. Make sure to choose vegan chocolate wafers or graham crackers, and use coconut milk or almond milk to moisten the cookies. This option caters nicely to those with dietary restrictions while preserving the same decadent flavors.
Variation: No-Bake Cheesecake Icebox Cake
For a creamier texture that balances the flavors of mint and chocolate, consider turning this cake into a **no-bake cheesecake icebox cake**. Incorporate a softened cream cheese layer with whipped cream in between the chocolate layers. The cream cheese adds richness and tanginess, making each slice a delightful experience.
Common Mistakes to Avoid
One common mistake when making the **St Patrick’s Day Mint Chocolate Icebox Cake** is over-whipping the cream. As mentioned, while you want to achieve soft peaks, going too far can result in a grainy texture that won’t incorporate smoothly into the layers. Always keep an eye on the mixing process and stop when you see the desired consistency.
Another issue usually encountered is allowing the cake to set for too short of a time. Skipping the chilling step will result in loose layers that don’t hold together well when you cut the cake. Always aim for at least 4 hours of chill time, and for the best results, overnight is ideal.
Lastly, using the wrong type of cookies can lead to a less enjoyable texture. Make sure to use cookies that are crisp enough to soften while absorbing moisture but not so soft that they disintegrate. If in doubt, a dry chocolate wafer or a sturdy graham cracker will work well.
Storage, Freezing & Reheating Tips
To best store your **St Patrick’s Day Mint Chocolate Icebox Cake**, keep it covered in an airtight container or wrapped tightly in plastic wrap. It can be stored in the refrigerator for up to 5 days. The cake’s flavors will continue to meld, often improving in taste as it sits, so don’t hesitate to enjoy leftovers!
If you want to make the cake ahead of time, it’s freezer-friendly as well. You can freeze the cake for up to 2 months. To freeze, wrap individual slices in plastic wrap and then place them in a freezer-safe container. When ready to serve, simply remove a slice from the freezer and let it thaw in the refrigerator for a few hours.
When it comes to reheating, this cake is best enjoyed chilled. If you attempt to reheat it, it’s vital to remember that the textures will change, and the structure may become too soft to hold. Therefore, enjoy this icebox cake in its original chilled state to savor its intended freshness and flavor.
Frequently Asked Questions
Can I make this cake ahead of time?
Absolutely! The **St Patrick’s Day Mint Chocolate Icebox Cake** is perfect for making ahead of time. In fact, it benefits from chilling overnight, as this allows all the flavors to meld beautifully and creates a better texture. Just remember to store it properly in the refrigerator until you’re ready to serve.
What’s the best way to slice an icebox cake?
To slice an icebox cake neatly, it’s essential to use a sharp knife. For the best results, dip your knife in warm water, wipe it dry, and then cut through the cake. This method helps ensure a clean slice without disturbing the layers and keeps your presentation beautiful.
Can I use other toppings for this dessert?
Yes! While chocolate chips are a classic choice, feel free to experiment with toppings like crushed cookies, fresh mint leaves, or even chocolate syrup. You can also use sprinkles or edible glitter for a festive touch, especially great for party settings.
Is it necessary to add food coloring?
Adding food coloring is completely optional! While it does enhance the visual appeal for St Patrick’s Day, the cake tastes wonderful without it. If you prefer a more natural look, simply skip this step and enjoy the rich chocolate and cream colors.
How do I know if the whipped cream is over-whipped?
When whipped cream is over-whipped, it becomes grainy and may even start to separate, turning into butter. You’ll want to stop whipping as soon as soft peaks form, meaning the cream holds its shape but is still smooth. If you’re unsure, err on the side of under-whipping; it’s easy to whip a bit more if needed.
Conclusion:
In summary, the **St Patrick’s Day Mint Chocolate Icebox Cake** is a delightful treat that perfectly combines festive flavors and creamy textures, making it an ideal dessert for any occasion. Its ease of preparation and versatility make it accessible for home cooks of all levels, allowing you to customize it to your tastes. You’re encouraged to try making this cake, perhaps customize it with your favorite ingredients, and share the experience with loved ones. So grab those chocolate wafers and mint extract, and get ready for a sensational dessert that will surely impress your family and friends!