**Meta Title:** Strawberry Cheesecake Classic Dessert
**Meta Description:** Discover how to make a creamy strawberry cheesecake that’s bursting with berry bliss. Perfect for any occasion!
You know that moment when you take the first bite of a luscious dessert and it feels like a hug for your taste buds? That’s exactly how I feel every time I savor a slice of this Strawberry Cheesecake. This classic dessert, with its creamy texture and vibrant fruitiness, is a favorite in our family. Whether it’s a holiday gathering, a summer barbecue, or simply a sweet treat on a weeknight, this cheesecake is always a hit. What makes it so special? Let me take you on a delicious journey.
## What is Strawberry Cheesecake?
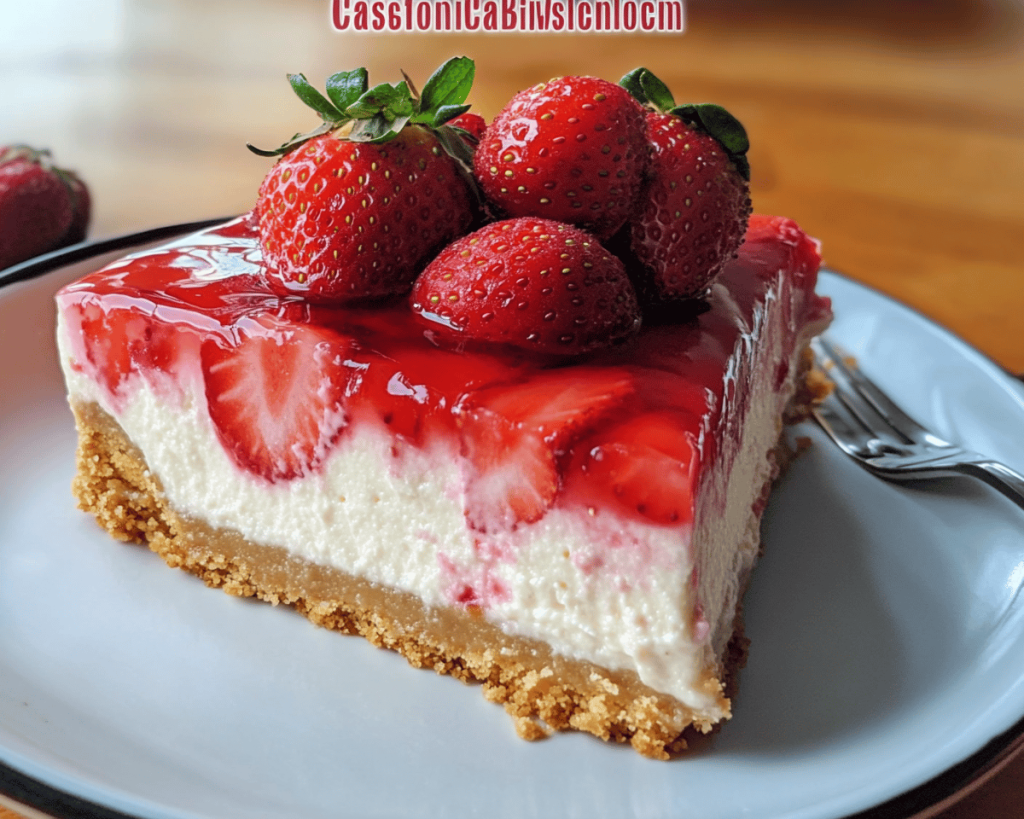
Strawberry cheesecake is a delightful dessert that combines a smooth, creamy cheese filling with the sweet and tangy flavor of fresh strawberries, all sitting atop a buttery graham cracker crust. Originating in ancient Greece, cheesecake has evolved over centuries, with different cultures putting their spin on this timeless treat. The classic American version made popular in the 19th century involves cream cheese, which gives it that silky richness we all adore.
But what really enhances this classic is the bright and vibrant flavor of strawberries. Imagine biting into a slice where the creamy cheese base meets the juicy fruit, creating a symphony of flavors that dances across your palate. The contrast of the crunchy crust, the velvety filling, and the fresh berry topping creates a delightful experience that’s both comforting and refreshing. It’s no wonder this dessert continues to be loved by many!
## Why You’ll Love This Strawberry Cheesecake
There are so many reasons to fall in love with this strawberry cheesecake, and it’s not just because it tastes exquisite. Here are a few standouts:
– **Creamy and Dreamy:** The luscious cream cheese filling is smooth and velvety, making every bite melt in your mouth.
– **Fresh and Fruity:** Bursting with the natural sweetness of ripe strawberries, this cheesecake feels light and vibrant, perfect for any season.
– **Crowd-Pleaser:** Whether you’re serving it at a birthday party, holiday feast, or simple family dinner, this cheesecake is sure to impress your guests.
– **Make-Ahead Magic:** It can be made a day in advance, saving you time while still delivering that fresh, delicious taste.
– **Versatile and Customizable:** You can swap out strawberries for other fruits like blueberries or raspberries, allowing for endless delicious variations.
Now that I have your taste buds tingling, let’s gather the ingredients to whip up this heavenly Strawberry Cheesecake!
## Ingredients You’ll Need
To create the most delightful strawberry cheesecake, you’ll need the following ingredients:
1. **Graham Crackers**: About 1 and ½ cups of finely crushed graham crackers serve as the perfect base. Look for fresh ones that have a nice crunch.
2. **Unsalted Butter**: You’ll need ½ cup of melted unsalted butter to bind the crumbs together, adding a rich flavor. Make sure it’s not too hot — just melted enough to combine.
3. **Cream Cheese**: Two packages (8 oz each) of softened cream cheese are essential. This provides that creamy, luscious filling we all love. Let it sit at room temperature for an hour before mixing to achieve the best texture.
4. **Granulated Sugar**: About 1 cup of sugar sweetens the dessert perfectly. Adjust based on the ripeness of your strawberries for a balanced flavor.
5. **Sour Cream**: Half a cup of sour cream adds richness and a slight tang which balances the sweetness—remarkably important for a great cheesecake.
6. **Vanilla Extract**: One teaspoon of pure vanilla extract enhances the flavor profile beautifully and rounds out the creaminess.
7. **Eggs**: Two large eggs are needed for binding and achieving that smooth texture. Make sure they are at room temperature as well for an even mix.
8. **Fresh Strawberries**: Approximately 1 pound of fresh strawberries, hulled and sliced, made into a topping that bursts with flavor. Choose bright red berries for the sweetest taste.
## How to Make Strawberry Cheesecake
Ready to embark on this creamy adventure? Here’s a step-by-step guide to creating your Strawberry Cheesecake.
### Step 1: Prepare the Crust
1. Preheat your oven to 350°F (175°C).
2. In a medium bowl, combine the crushed graham crackers and melted butter, mixing them until the mixture resembles wet sand. This will give you a perfectly textured base.
3. Press this mixture firmly into the bottom of a 9-inch springform pan, making sure to create an even layer that extends slightly up the sides. This helps hold in that delicious filling!
4. Bake the crust for about 8-10 minutes, until it’s lightly golden. The aroma will fill your kitchen as it bakes — a hint of warm cinnamon and buttery goodness.
### Step 2: Make the Filling
1. In a large mixing bowl, beat the softened cream cheese and granulated sugar together until smooth and creamy with no lumps. This usually takes around 3-5 minutes on medium speed.
2. Add in the sour cream, vanilla extract, and eggs, mixing until combined. Be sure to scrape down the sides of the bowl — no one likes a lumpy cheesecake!
3. Once fully mixed, pour the filling over the warm crust in the springform pan, smoothing the top with a spatula. If you see air bubbles, gently tap the pan on the counter to release them.
### Step 3: Bake and Cool
1. Bake the cheesecake for 45-55 minutes, or until the center is set but still slightly jiggly. It will continue to cook as it cools, so don’t overbake it.
2. Once baked, turn off the oven and crack the door open, allowing the cheesecake to cool slowly for about an hour. This prevents cracking on the surface!
3. Move the cheesecake to the fridge and chill for at least 4 hours, but overnight is best for optimal texture and flavor.
### Step 4: Prepare the Strawberry Topping
1. While the cheesecake is chilling, wash and hull the strawberries. Slice them thinly for a beautiful presentation.
2. In a small bowl, combine the sliced strawberries with a tablespoon of sugar. This helps to draw out their juices and creates a lovely syrup that’ll enhance the topping.
3. Let the berries sit for at least 30 minutes at room temperature, mixing occasionally.
### Step 5: Assemble and Serve
1. Once the cheesecake is fully chilled, carefully run a knife around the edge before releasing the springform pan. This helps keep the sides smooth and beautiful.
2. Top the cheesecake with the macerated strawberries, ensuring they are evenly distributed across the surface.
3. For an extra touch, drizzle some of the syrup over the cheesecake and serve with whipped cream, if desired.
## Tips, Tricks & Variations
Here are some expert tips to help you achieve the best strawberry cheesecake:
1. **Prevent Cracks:** To avoid cracking, bake the cheesecake in a water bath (bain-marie) by placing the springform pan in a larger pan filled with hot water while it bakes.
2. **Storage:** Store leftover cheesecake in an airtight container in the refrigerator for up to 5 days. You can also freeze it for a month; just ensure you wrap it well!
3. **Flavor Boost:** Experiment with flavor by adding lemon zest or swapping out some of the vanilla with almond extract for a unique twist.
4. **Gluten-Free Option:** Use gluten-free graham crackers or a nut-based crust to meet dietary needs without sacrificing flavor.
5. **Berry Variations:** You can replace strawberries with other fruits such as blueberries, raspberries, or even a mixed berry topping for a different seasonal flair.
## What to Serve With Strawberry Cheesecake
This Strawberry Cheesecake pairs beautifully with a variety of accompaniments to elevate your dessert experience:
– **Whipped Cream:** A dollop of freshly whipped cream adds extra richness and lightness that contrasts well with the dense cheesecake.
– **Coffee or Tea:** Serve it alongside a cup of robust coffee or refreshing herbal tea to complement the flavors.
– **Chocolate Sauce:** A drizzle of chocolate sauce over the top can provide a delightful bitter contrast to the sweetness of the strawberries.
– **Mint Leaves:** Fresh mint leaves not only add a pop of color but also an aromatic freshness on each bite.
## Nutrition & Health Benefits
This strawberry cheesecake, although a dessert, carries some nutritional benefits. Each slice contains a balance of carbohydrates, protein from the cream cheese, and vitamins from the fresh strawberries. A standard slice offers roughly 350-400 calories. It’s a delightful treat that, when enjoyed in moderation, can fit your dietary plan. You can read more about healthy dessert choices from [Healthline](https://www.healthline.com/nutrition/healthy-desserts), which emphasizes balance and moderation.
## Frequently Asked Questions
1. **Can I use different fruits for the topping?**
Absolutely! You can swap strawberries for blueberries, raspberries, or even peaches. Each fruit lends a unique flavor that pairs beautifully with the creamy cheesecake.
2. **How long does strawberry cheesecake last?**
If stored properly in the refrigerator, strawberry cheesecake can last for up to 5 days. Just make sure to cover it well to maintain freshness.
3. **Can I freeze the cheesecake?**
Yes! You can freeze leftover cheesecake for up to a month. Wrap it tightly in plastic wrap and then aluminum foil. thaw it overnight in the refrigerator before serving.
4. **What type of cream cheese should I use?**
Opt for full-fat cream cheese for the richest and creamiest texture. Brands like Philadelphia are popular choices among bakers for their consistent quality.
5. **How can I make this cheesecake lighter?**
You can use light cream cheese or Greek yogurt as a substitute for sour cream to reduce fat content while still retaining a creamy texture.
## Conclusion
As we wrap up this delightful journey into the world of strawberry cheesecake, I hope you’re inspired to bring this dreamy dessert into your own kitchen. Each slice is a celebration of flavors, textures, and joyous gatherings, making it the perfect choice for any occasion or even just a quiet evening at home. So, gather your ingredients, put on your apron, and create this creamy strawberry cheesecake tonight. Don’t forget to snap a picture and share your results with friends — your culinary triumph deserves to be celebrated! If you loved it, leave a comment or tag me on Instagram. Happy baking!