Prep time: 15 minutes
Cook time: 30 minutes
Total time: 45 minutes
Servings: 16 brownies
Finding a dessert that satisfies a chocolate craving while also bringing a splash of color to the table can be a challenge. Yet, the best fudgy red velvet brownies are the perfect solution! These brownies combine the rich, decadent flavors of chocolate with a beautiful red hue, making them a standout treat for any occasion. Ideal for busy parents, beginner cooks, or anyone wanting to impress guests, this recipe offers an appealing way to make dessert memorable.
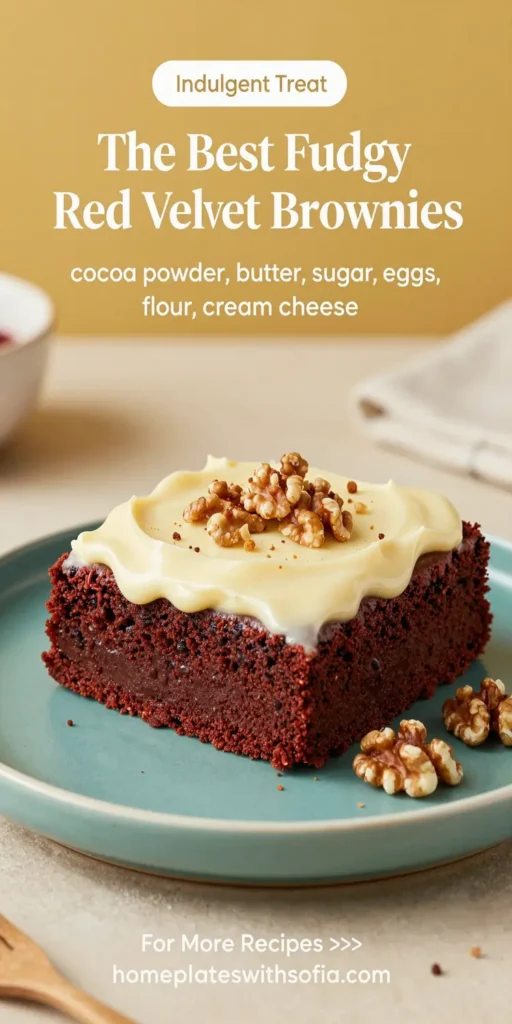
What Is The Best Fudgy Red Velvet Brownies?
The best fudgy red velvet brownies are a delightful twist on classic brownies, capturing the essence of red velvet cake but in brownie form. They are intensely chocolatey and have a moist, fudgy texture that melts in your mouth. The addition of cocoa powder gives them their rich chocolate flavor, while buttermilk introduces a hint of tanginess that balances the sweetness. Topped with a cream cheese frosting or simply dusted with powdered sugar, these brownies become an inviting treat that brightens any dessert table.
Why You’ll Love This
There are numerous reasons why these fudgy red velvet brownies will quickly become your new favorite dessert. Firstly, the vibrant color is eye-catching and festive, making them perfect for celebrations or simple family gatherings. Secondly, they are incredibly easy to make, requiring standard pantry ingredients, which makes them accessible for busy parents and kitchen beginners alike. Finally, you’ll love the unique texture—fudgy, dense, and yet so light that it keeps you coming back for just one more piece. Whether for a birthday party, holiday gathering, or a quiet night in, these brownies certainly bring joy and sweetness into your life.
Ingredients You’ll Need
- 1 cup (2 sticks) unsalted butter: This is crucial for richness and helps create that fudgy texture.
- 2 cups granulated sugar: Sweetens the brownies and contributes to a beautifully smooth texture.
- 4 large eggs: They bind ingredients together and provide moisture.
- 2 teaspoons vanilla extract: Adds a delicious depth of flavor.
- 2 ½ cups all-purpose flour: Provides structure to the brownies.
- 1 cup unsweetened cocoa powder: The star ingredient that gives these brownies their rich chocolate flavor.
- 1 teaspoon baking soda: This helps the brownies rise and become fluffy.
- ½ teaspoon salt: Enhances all the flavors and balances the sweetness of the sugar.
- 1 cup buttermilk: Adds moisture and the signature tanginess of red velvet.
- Red food coloring (2 tablespoons): For that vibrant red color typical of red velvet.
How to Make
- Begin by preheating your oven to 350°F (175°C). This ensures an even bake and helps achieve that perfect fudgy consistency. Prepare a 9×13 inch baking pan by greasing it or lining it with parchment paper for easy removal.
- In a large mixing bowl, melt the unsalted butter. Once melted, stir in the granulated sugar until the mixture is smooth and well blended. The heat from the butter will help dissolve the sugar, enhancing the final texture of the brownies.
- Next, add the eggs one at a time, making sure to whisk fully after each addition. This step is crucial as it incorporates air into the mixture, contributing to the fudgy texture you desire.
- Whisk in the vanilla extract, followed by the cocoa powder, flour, baking soda, and salt. Mix until just combined; be careful not to overmix as this can lead to tougher brownies.
- Pour in the buttermilk and mix until smooth. The buttermilk not only adds moisture but also gives that classic red velvet taste.
- Finally, add the red food coloring. Start with a small amount and mix well; you can adjust for a deeper shade if preferred. Pour the batter into the prepared baking pan and smooth it out evenly.
- Bake in the preheated oven for about 30 minutes, or until a toothpick inserted in the center comes out with a few moist crumbs. Do not overbake, as you want that fudgy center!
- Let the brownies cool in the pan for about 20 minutes before transferring them to a wire rack to cool completely. This waiting period allows the flavors to settle and the texture to firm up a bit.
Variations & Substitutions
Nutty Delight: For a delightful crunch, consider adding chopped walnuts or pecans to your brownie batter. The nuts add texture and a lovely contrast to the fudgy brownie. Simply fold in about 1 to 1½ cups of your preferred nuts just before pouring the batter into the pan.
Cheesecake Swirl: For a rich, creamy dimension, consider a cheesecake swirl. Combine 8 ounces of softened cream cheese with 1/3 cup sugar and 1 egg. Drop spoonfuls over the brownie batter and swirl with a knife before baking. This results in beautiful marbling and adds a decadent layer of flavor.
Gluten-Free Option: If you or someone you know has gluten sensitivities, you can substitute the all-purpose flour with a gluten-free flour blend. Ensure that your blend contains a binder like xanthan gum to maintain the brownies’ structure.
Red Velvet Cake Mix Brownies: Short on time? Use a red velvet cake mix, and follow the instructions to make brownies instead! Simply add some extra cocoa powder, and follow the standard brownie baking time.
Common Mistakes to Avoid
While making fudgy red velvet brownies, there are a few common mistakes that can lead to less-than-ideal results.
Overmixing the Batter: Overmixing can create tough brownies. Mix until just combined to keep that fudgy texture intact.
Baking Too Long: Overbaking leads to dry brownies. Keep an eye on the bake time, checking for doneness a few minutes earlier than suggested.
Using Cold Ingredients: Using cold eggs or buttermilk can hinder the mixture’s ability to fully incorporate. Allow these ingredients to come to room temperature before starting to guarantee a smoother batter.
Storage, Freezing & Reheating Tips
To store your fudgy red velvet brownies, let them cool entirely and then place them in an airtight container. They will stay fresh at room temperature for up to 3 days. If you want to extend their shelf life, consider refrigerating them, where they can last up to a week.
For freezing, make sure the brownies are completely cool and cut into squares. Place each brownie into a freezer-safe container, separating layers with parchment paper to prevent sticking. These can be kept in the freezer for up to 3 months. When you’re ready to enjoy, let them thaw at room temperature or reheat slightly in the microwave for a warm, fudgy experience.
Frequently Asked Questions
Can I make these brownies ahead of time? Absolutely! Brownies actually taste better the next day as the flavors meld together. You can prepare them a day in advance and store them in an airtight container at room temperature.
Why do you use buttermilk instead of regular milk? Buttermilk adds a rich tang to the brownies and contributes to their moist texture. It reacts with baking soda to create a fluffy, tender crumb.
Can I omit the food coloring? While the traditional red velvet flavor is enhanced by the coloring, you can certainly leave it out. The brownies will taste just as delicious without it, but you’ll miss that signature red hue.
What can I serve with these brownies? These brownies can be enjoyed on their own, but they pair wonderfully with vanilla ice cream or a dollop of whipped cream. A sprinkle of powdered sugar on top also adds a sweet finish.
How do I know when my brownies are done? The perfect fudgy brownies will be set around the edges but still slightly soft in the center. A toothpick inserted should come out with moist crumbs, not clean, indicating a fudgy texture.
Conclusion: The best fudgy red velvet brownies are not just desserts; they embody joy and color in every bite. Whether you’re indulging on a cozy night in or celebrating a special occasion, this recipe is sure to impress. By using simple ingredients and following these guided steps, you’ll create a delightful treat that your friends and family will adore. Experiment with variations, avoid common mistakes, and make these brownies your own! Enjoy every bite!