Let’s Get Real
Okay, can we all just take a moment to acknowledge that the weather outside is a total mood killer? I mean, one minute it’s overly bright sunshine like the universe is trying to blind me, and the next moment, it’s pouring rain while I try to walk my dog, who is clearly plotting some kind of rebellion against the concept of going outside. So, what’s the best way to deal with unpredictable weather? Enter: comfort food. And, oh boy, do I have a treat for you today that’ll make you forget all about the crazy storm brewing outside.
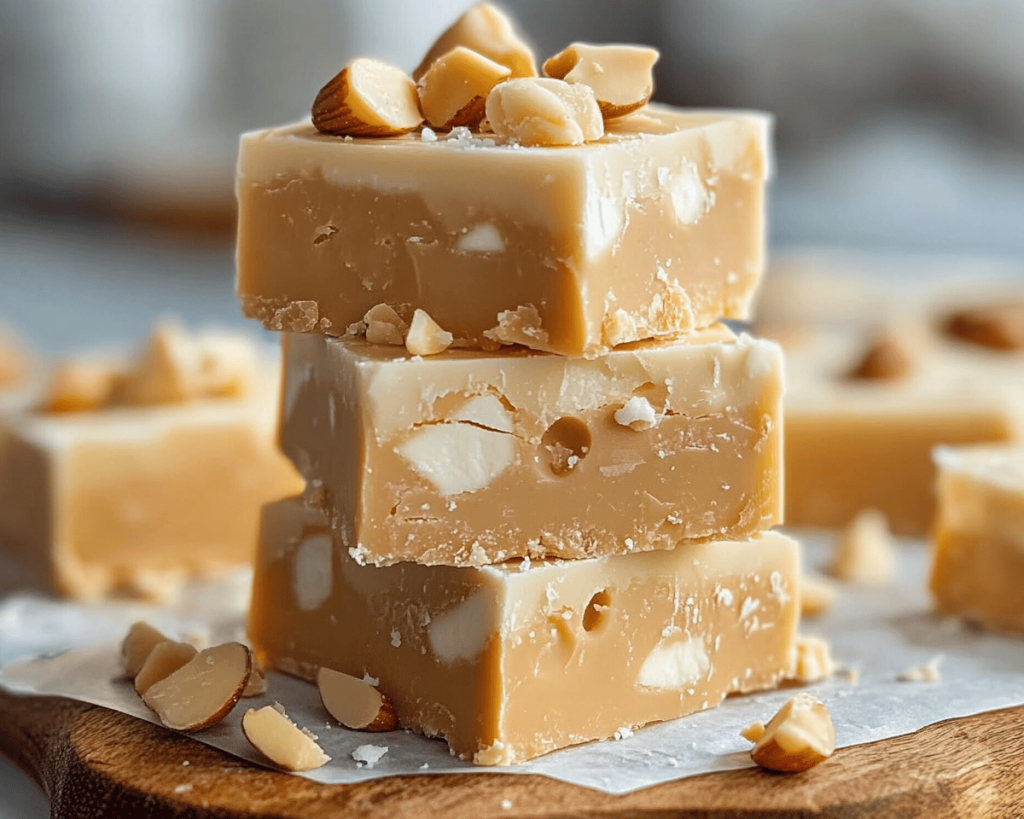
I’m talking about White Chocolate Peanut Butter Fudge. Now, let me be real—when I was a kid, I thought fudge was one of those weird adult foods that only my parents ate while they reminisced about their childhoods. But now? Now that I’m an adult who can eat two whole slabs of fudge without judgment, I’m convinced that fudge is a magic potion for the soul. I made this for the first time last year when summer decided to take a break, and I have barely stopped since. It’s rich, it’s creamy, and it has that glorious, sweet-and-salty balance that hits the spot every.single.time.
Plus, if I’m being honest, all my friends love me just a bit more whenever I whip up a batch of this fudge. I mean, pour some deliciousness into a little plastic bag and voilà, instant popularity. So let’s make something that not only brings you joy but also wins you social status. Trust me, you’re gonna want to share this with pretty much everyone in your life. So grab your bowl (preferably your biggest one; trust me, we’ll need it), and let’s get our fudge game on!
Ingredients, Unfiltered
What’s Really in White Chocolate Peanut Butter Fudge
Let’s break it down real quick and give a sassy little spotlight to our ingredients—the stars of the show.
White Chocolate Chips: You know, those little buttons of happiness that melt into creamy perfection. I use semi-sweet white chocolate because honestly? The sweeter the better when you’re dealing with something like peanut butter fudge. Grab a bag and don’t feel guilty about eating a few squares. They’re practically begging you to go to town.
Peanut Butter: This isn’t just any peanut butter; I’m obsessed with the kind that’s all-natural, no weird added sugars or oils. Give me the good stuff! The kind that comes from an actual nut – you know, those things in the aisle between oat milk and pasta. I like to think of peanut butter as a big hug for my fudge, giving it that rich, nutty taste and creamy texture.
Butter: Ah, glorious butter—the magical golden block that makes everything taste better. I use unsalted because I still like to control how salty my fudge gets. Pour it into the mix and get ready for flavor town, population: this fudge.
Sweetened Condensed Milk: Seriously! If you haven’t been cooking with this liquid gold, what are you doing with your life? It’s basically a shortcut to a richer dessert without having to put in hours of effort. Also, it’s so sweet you could probably drink it from the can (but don’t, please, that would be really weird).
Vanilla Extract: I like to add this not only for the flavor but also because I feel fancy when I pour it in. Nothing says “I’m a sophisticated adult” like some high-quality vanilla extract. You can go for synthetic, but the real stuff? That’s where the magic happens.
Let’s Talk Health (or Not)
Is This Even Healthy? Let’s Discuss
Look, I’m not about to blow smoke. Yes, there’s butter. Yes, there’s white chocolate and condensed milk, which are basically candy in liquid form. And yes, peanut butter is there too, but let’s just admit: it’s got a few calories. So, if you’re looking for a health food blog, you’ve seriously stumbled into the wrong kitchen.
But here’s the thing: you only live once, and if there’s one thing I love, it’s splurging a bit on sweet treats that bring me joy. So, just take a deep breath and remember: moderation is key! You don’t need to eat the whole batch in one sitting (but hey, if you do, I won’t tell anyone). If you’re interested, you could try using a low-sugar white chocolate or dark chocolate as an alternative.
White Chocolate Peanut Butter Fudge is more about indulgence and happiness rather than counting calories. Life is short, fudge wisely!
Your Grocery List
Here’s What You’ll Need
Before we jump into the hot mess that is my cooking process, here’s what you’ll need to pull off this delightful dish:
– 1 cup white chocolate chips
– 1 cup creamy peanut butter (no chunky stuff, keep it smooth)
– ½ cup unsalted butter
– 1 (14 oz) can sweetened condensed milk
– 1 teaspoon vanilla extract
This will make about 16 pieces of fudge, depending on how generous you want to be. Seriously, if you cut them small, you can feel less guilty about eating that second (or third… or fourth) piece.
The Actual Cooking Part
Okay, Let’s Make This
Alright, time to conjure some fudge magic. First, grab a glass bowl, because we’re going to be melting some things, and plastic is just asking for trouble.
1. **Melt the butter**: Throw your butter into that glass bowl and pop it in the microwave. I always start with 30 seconds and then check. You want it completely melted, not bubbling like a volcano. I once set off the smoke alarm when I left it in too long. Let’s just say that’s a fun story for another time.
2. **Add the peanut butter**: Once your butter is melted and chemical-free, it’s time for the hero—your creamy peanut butter! Stir it into the butter until fully combined. At this point, it should smell like a heavenly combination of childhood dreams.
3. **Mix in the white chocolate**: Once the butter and peanut butter are well incorporated, toss in those white chocolate chips. Stir, stir, stir until it looks like a beautiful blend of joy. Beware of the stubborn lumps; they’ll try to tempt you to keep stirring forever. Just be patient.
4. **Heat it up**: Once your mix is homogeneous (what a fancy word for “all mixed up”), pop that bowl back in the microwave for about 30 seconds. After, take it out and stir again—keep this dance up until it’s all melted and luxurious. If it looks like you’ve just created a mini-pool of molten magic, congratulations! You’re halfway there.
5. **Add sweetened condensed milk**: This is where things really get saucy. Stir in your sweetened condensed milk and watch as it smooths everything out like butter on toast. It’s basically like adding happiness to a bowl. *Seriously though, try to resist the temptation of licking the spoon while this is going on… it’s hard, I know.*
6. **Vanilla goodness**: Next, toss in that vanilla extract. It’s about to become more aromatic than an expensive perfume at a fancy store, so brace yourself. Mix until smooth and be prepared to be overwhelmed by the delicious scent.
7. **Pour and set**: Grab an 8×8-inch pan (or whatever you have that’s square; it doesn’t have to be ideal here) and line it with parchment paper. Gently pour your fudge mixture into the pan and spread it around until it’s even. Don’t panic if it looks messy—it’s supposed to.
8. **Chill**: Now, all you need to do is let it cool. This is the hardest part—in my opinion, waiting is worse than being in line at the DMV. Stick it in the fridge for about two hours (or, like, half an hour if you’re super impatient like me and you want it slightly melted when you start tasting).
9. **Cut it up**: Once it’s set and completely cooled, it’s time to cut it into the squares of utter bliss. I like to keep mine in little plastic sandwich bags in the fridge, making it easy to grab a piece or two whenever I need a little pick-me-up. Don’t forget to sneak a piece for yourself right away—quality control, you know?
Side Notes & Sassy Hacks
Bonus Tips You Didn’t Ask For
– If you’re feeling fancy, throw in some crushed nuts or sea salt on top before letting it set. It adds a lovely touch! (Though for the record, if you ask me, adding nuts to dessert is just wrong. A true dessert should be all about that rich texture, am I right?)
– Don’t have white chocolate chips? You can try using vanilla baking chips or even caramel chips if you want to switch it up! But then, let’s be honest, is it really White Chocolate Peanut Butter Fudge anymore?
– Storing: Keep this fudge tightly wrapped in the fridge for up to two weeks, but let’s be real; it won’t last that long in my house. I practically inhale the stuff.
– Need a quick treat for a party? Slice it into cute little hearts or stars with cookie cutters for instant fabulousness. Or just throw a bunch of random pieces onto a rustic platter like you’re hosting a rustic chic gathering. It’s all about the presentation, baby!
Final Words of (Culinary) Wisdom
So there you have it, my culinary masterpiece of White Chocolate Peanut Butter Fudge! I promise, once you set off on this endeavor, your kitchen will smell like a magical place where only good vibes exist. And if you try it, tag me! Or just send me a mental high-five because let’s be honest, we all know this is your new favorite recipe.
Now, go forth and melt some hearts (and stomachs) with this fudge. And remember: life’s too short to waste on mediocre treats. So grab your ingredients and let your culinary dreams take flight. Happy fudging!