Prep time: 20 minutes
Cook time: 0 minutes
Total time: 20 minutes
Servings: 12
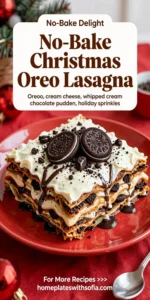
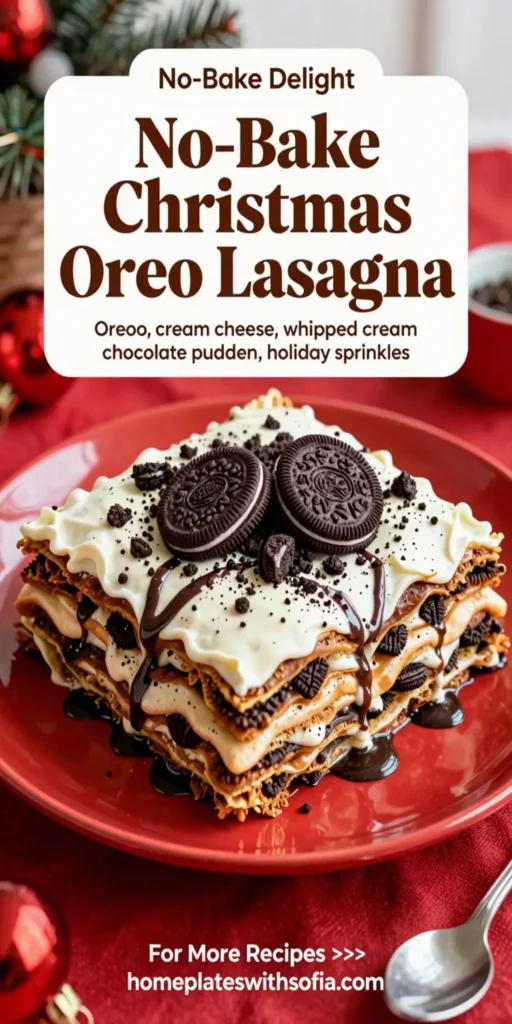
No-Bake Christmas Oreo Lasagna is a delightful, creamy dessert that offers a festive twist on the classic lasagna. It’s perfect for holiday gatherings, potlucks, or simply enjoying at home with family. Made with layers of chocolate cookies, a rich cream cheese mixture, and whipped topping, it is both easy to prepare and impressive to serve. No baking required means you can whip this up even on your busiest days, making it a fantastic choice for busy parents or kitchen beginners.
What Is No-Bake Christmas Oreo Lasagna?
No-Bake Christmas Oreo Lasagna is a layered dessert that combines the beloved flavor of Oreos with a rich cream cheese filling and fluffy whipped topping. This decadent treat comes together in a gorgeous lasagna-styled presentation, sure to wow guests and family alike. Each bite delivers layers of harmoniously blended flavors and textures—crispy cookie, smooth cream, and light fluff. It truly embodies the essence of festive desserts without the hassle of baking.
Why You’ll Love This
One of the most appealing aspects of this recipe is its simplicity. With minimal prep time and no need for an oven, it’s ideal for last-minute holiday festivities. The layers bring a sense of indulgence without overwhelming sweetness, allowing everyone to enjoy a slice without guilt. In addition, it’s adaptable; you can easily customize it to suit different tastes or dietary preferences, making it a versatile dessert. Plus, it looks stunning on a dessert table, adding to the festive spirit of your gathering.
Ingredients You’ll Need
- Oreo cookies: 2 cups, crushed. These chocolate sandwich cookies form the base and add a delightful crunch.
- Butter: ½ cup, melted. This binds the crushed cookies together in a crust-like layer.
- Cream cheese: 8 ounces, softened. Provides a rich and creamy texture to the dessert.
- Powdered sugar: 1 cup. Sweetens the cream cheese mixture without adding graininess.
- Vanilla extract: 1 teaspoon. Enhances the overall flavor profile.
- Cool Whip: 16 ounces, thawed. Adds a light, fluffy layer that complements the denser bottom layers.
- Chocolate syrup: for drizzling. Adds an extra layer of sweetness and visual appeal.

How to Make
- Prepare the base: Begin by crushing the Oreo cookies in a food processor or by placing them in a resealable plastic bag and crushing them with a rolling pin. You want fine crumbs, as these will form the base of your lasagna. Combine the crushed cookies with melted butter in a bowl until the mixture resembles wet sand.
- Form the crust: Spread the cookie mixture evenly at the bottom of a 9×13-inch dish. Press it down firmly to create a solid crust. This step is crucial; a well-pressed crust will support the layers above without crumbling apart when served.
- Make the cream cheese filling: In a mixing bowl, beat the softened cream cheese until smooth and fluffy. Gradually add the powdered sugar and vanilla extract, mixing until combined. This filling is creamy and slightly tangy, balancing perfectly against the sweetness of the cookies.
- Add the first layer: Spread half of the cream cheese mixture evenly over the crust. Use a spatula for a smooth finish. This will be the first layer of decadence in your dessert.
- Layer the Cool Whip: Spoon half of the Cool Whip over the cream cheese layer, spreading it gently to maintain the layers you’ve built. It’s important to be gentle to preserve the light texture of the Cool Whip.
- Repeat the layers: Repeat the layers starting with the remaining cream cheese mixture, followed by the remaining Cool Whip. This will give you a beautiful statement dessert with contrasting layers that everyone will love.
- Chill: Cover the dessert with plastic wrap and refrigerate for at least 4 hours, or overnight if possible. Chilling allows the layers to meld beautifully, improving the overall texture and flavor.
- Serve: Before serving, drizzle chocolate syrup over the top for a gorgeous finish. Cut into squares and serve, enjoying the delight as your guests dive into this unforgettable dessert.
Variations & Substitutions
Mint Oreo Variation: Swap traditional Oreos with Mint Oreos for a refreshing twist. The mint flavor with the cream cheese layer is invigorating and perfect for holiday gatherings. It adds a seasonal touch that feels festive. You can also add crushed peppermint candies on top for extra crunch and color.
Peanut Butter Lover’s Variation: Incorporate peanut butter into the cream cheese mixture for a nutty flavor that complements the chocolate. Simply add ½ cup of creamy peanut butter while mixing the cream cheese for a luscious result. You can also use chopped peanut butter cups as a layer between the cream cheese and Cool Whip.
Gluten-Free Option: Use gluten-free chocolate sandwich cookies instead of traditional Oreos to keep this dessert suitable for gluten-sensitive guests. Ensure to check that the other ingredients, like Cool Whip, are gluten-free as well. This variation allows everyone to enjoy this festive dessert regardless of dietary restrictions.
Common Mistakes to Avoid
One common mistake is not allowing the dessert to chill long enough. This can result in a messy presentation and layers that do not hold together well. Make sure to give it at least 4 hours, or, preferably, overnight.
Another pitfall is overmixing the cream cheese. If overmixed, the filling can become too airy, leading to a less dense texture. Mix just until combined for a smooth and creamy filling.
Finally, be cautious not to skip the melting of the butter; this step is crucial for binding the crust together. If the butter isn’t fully melted, the crust will crumble when sliced.
Storage, Freezing & Reheating Tips
Store any leftovers in an airtight container in the refrigerator for up to 3 days. It will maintain its flavor and texture, though the layers may slightly settle over time. Avoid freezing this dessert, as the whipped topping can change texture and become grainy once defrosted.
When serving leftovers, allow them to sit at room temperature for about 10 minutes for easier slicing. If you decide to make this dessert ahead of time, note that its flavor enhances as it chills, making it exceptional if prepared a day in advance.
Frequently Asked Questions
Can I make No-Bake Oreo Lasagna ahead of time?
Yes, you can prepare this dessert a day in advance. In fact, it’s often recommended as the flavors meld beautifully when given some time in the refrigerator. Just ensure it’s well covered to prevent any odors from other foods affecting its flavor.
Can I use different flavors of Oreos?
Absolutely! You can customize the flavor by using different Oreo varieties, such as peanut butter or mint. Each will give your lasagna a unique twist and keep the dessert exciting for multiple occasions.
How long does No-Bake Christmas Oreo Lasagna last?
This dessert can last in the refrigerator for up to 3 days. Keep it covered to maintain freshness. However, if left out for an extended period, especially at room temperature, it’s best to discard any leftovers to ensure food safety.
Is it possible to use regular whipped cream instead of Cool Whip?
Yes, you can substitute regular whipped cream for Cool Whip, although it may not hold its shape as well. If you go this route, make sure to stabilize the whipped cream by using cornstarch or gelatin for a firmer texture.
Can I add fruit to the dessert?
Yes, adding fruit such as sliced strawberries or raspberries can introduce freshness to the richness of this lasagna. Layering some berries between the cream and Cool Whip layers can create a beautiful color contrast and enhance the overall flavor profile.
Conclusion:
No-Bake Christmas Oreo Lasagna is an easy, flavorful dessert that embodies everything festive without the fuss of baking. It brings joy and satisfaction to any holiday table and appeals to both the eye and the palate. Whether enjoyed at a family gathering or a holiday party, this creamy treat will have everyone coming back for more. Grab your ingredients, and let the celebrations begin!